How to Build a Self-Watering Container in 7 Steps

Why a Self-Watering Container?
With spring flitting in and out of March like a tease, I was aching this weekend to start a vegetable garden. Lacking any yard space, my roommates and I decided to put containers up on our rooftop.
With water access not readily available on my rooftop, I did some research and decided to take the extra time to build the intriguingly titled "Self Watering" container model. The benefits were numerous; not only - I learned - do these containers retain more water than your average-Joe normal plant container, but they also promote better root growth and retain more nutrients. And let me tell you friends: Self-Watering containers are a whole lot of fun to make, once you've got the materials and tools (or in my case, and obliging boyfriend with the tools).


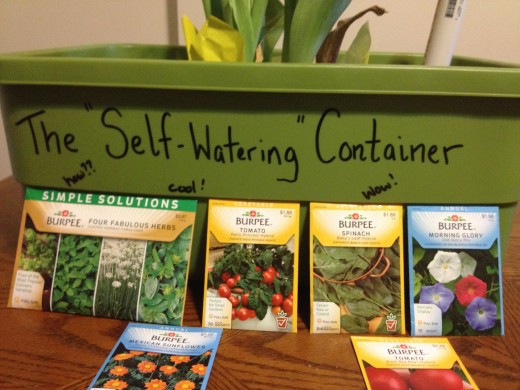
Materials Needed
There are many forms a Self-Watering Container can take - the multitudes of which can be found across the vast supply of DIY forums on the internet. But to make my specific version, you will need the following materials:
- Tub or other planting container
- PVC pipe
- Burlap
- Wire mesh
All of these items we found at Home Depot. Tools you will need include:
- Shears (for cutting the wire mesh)
- Drill (for making drainage holes)
- Possibly a wooden board (for bending the wire mesh more neatly)
- Possibly a hand saw (for cutting the PVC pipe to desirable size)
Test Yourself: What do you Know about Self-Watering Containers so far?
view quiz statisticsThe Components of a Self-Watering Container
The concept is to provide a steady source of water for your plants by creating in your plant container:
- A Water Reservoir below the soil that can be wicked up by the plant as needed.
- A Tube for pouring water from the surface into the reservoir.
- A Drainage hole that keeps the soil from getting water logged.


The 7 Steps to Building a Self-Watering Container
Step 1: Measure your wire mesh. It should be slightly bigger than the bottom of your container.
Step 2: Cut the wire with shears and fold over the sides to make a rectangle that fits comfortably inside your container. We used a wooden board to help us with folding the mesh evenly.

Step 3: Cut a square of burlap sack that completely covers the wire mesh.
Why? The burlap sack with the wire mesh creates a barrier that will separate the soil (on top) from the water reservoir (below).

Step 4: Cut a hole in the wire mesh and burlap to put the PVC pipe through. This is what you will pour the water through to reach the reservoir under the wire mesh.
Step 4.5: Cut the PVC pipe down to a reasonable height if it is standing very tall above the container - you want to make it easy to pour water into.
Then cut the bottom end off at a diagonal to facilitate water flow into the reservoir. (Note: We did not actually do this last step, as some of us thought it was superfluous and too fancy. Though I think I should mention that most other sources will list it as part of their design.)
Put it all together!


Step 5: Drill a few drainage holes right above where the wire mesh/burlap and soil will meet.
Step 6: Fill the container with soil, and plant away! (We used a basic organic potting soil).

Step 7: Pour water down the PVC tube. You should know when it’s filled because water will start trickling out the drainage holes. (This may take awhile so if you think you’ve watered enough you can always walk away and come back in a couple minutes to check.)
Test your Self-Watering Container Know-How
view quiz statistics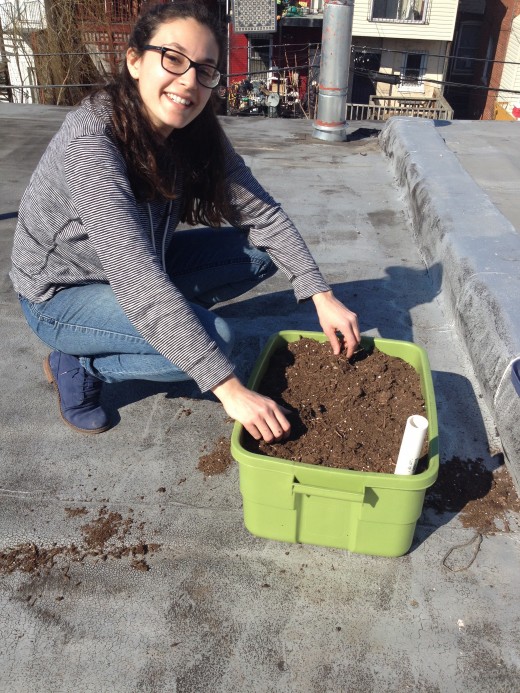
Caution: Not a "No-Watering" Container
Alas, don’t think that the Self-Watering container allows you to go away for a week in the middle of the summer without a plant-sitter! In the hottest months it still needs to be watered every other day if it hasn’t rained.
With eight superior self-watering containers done, now my roommates and I just need to find a way to get all that water up to our rooftop garden…I guess I’ll be looking for blogs on pulley systems.


